DIY Light Bulb Vase
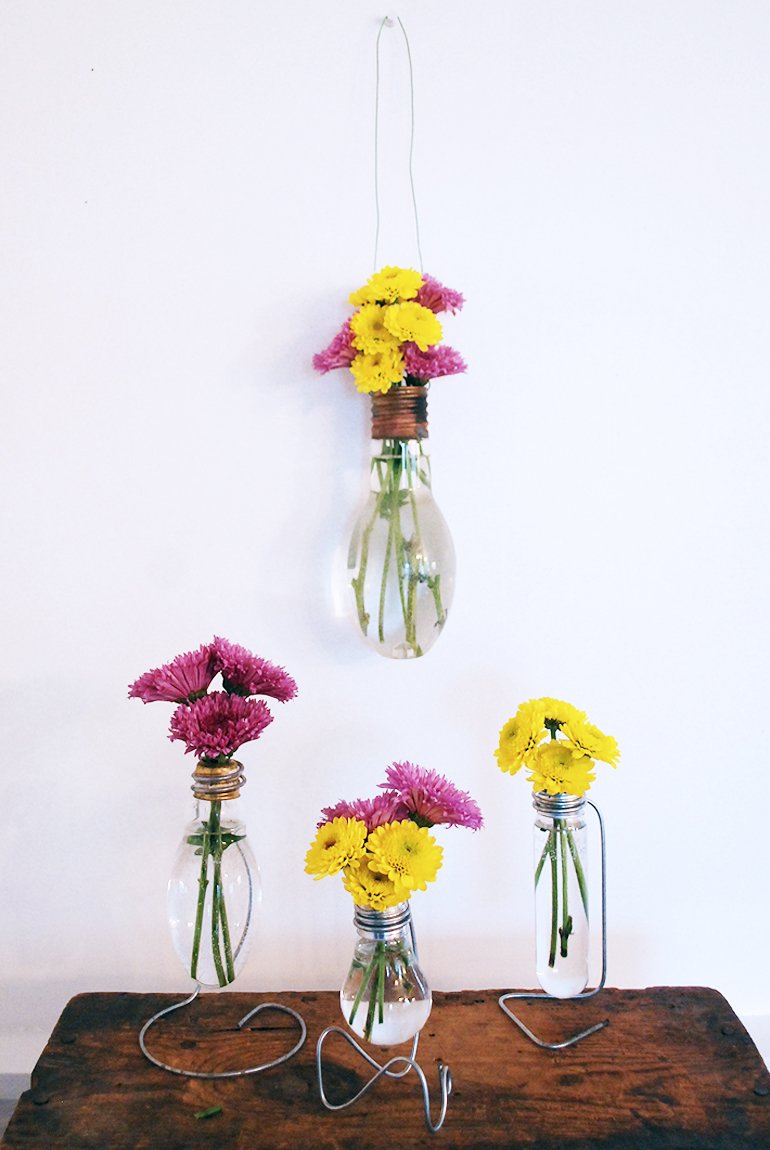
A few years ago, I spotted an upcycled light bulb vase in a magazine and thought my mom needs that! I showed Mike the picture and told him he should try to make one for her. So he did. (What a guy!) He’s made quite a few different styles of them over the last few years. I finally captured the process of how he does it to share with you. So start saving those old light bulbs and get your craft on! (These make great Mother’s Day gifts!)

Supplies you’ll need:
For the vase:
- old light bulbs
- needle nose pliers
- nail set
- hammer
For the stand/hanger:
- wire / floral wire for hanging vase
- wire cutters
- wooden dowel
- drill
- electrical tape – optional
You’ll be working with glass, so it’s a good idea to wear safety goggles and gloves. (Mike did not put safety first!).
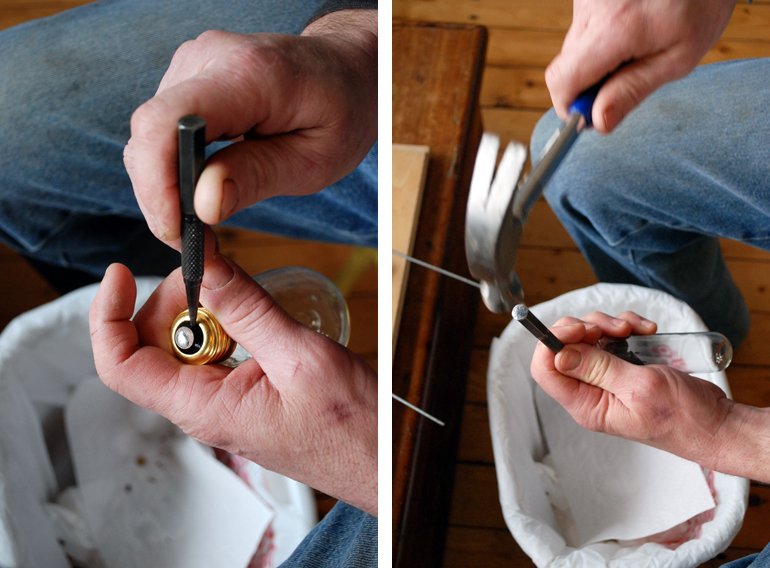
Over a garbage can, use the nail set and hammer to break the black part of the bulb…be careful, it is glass.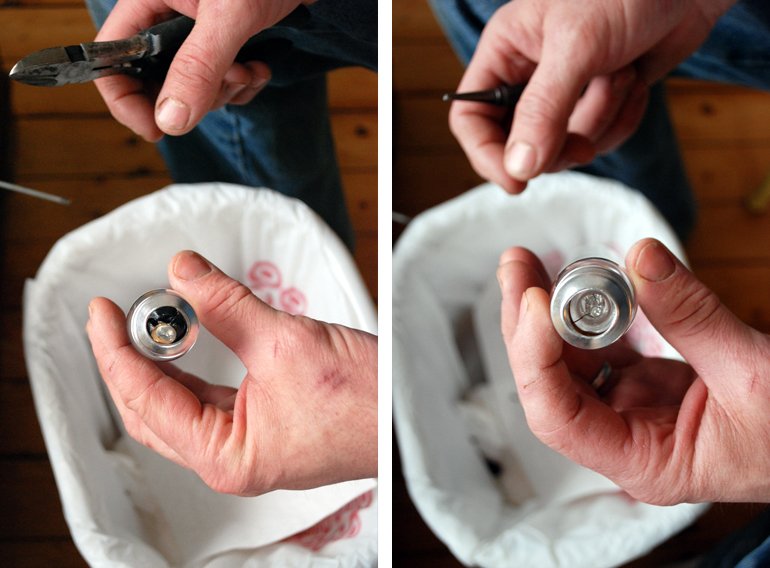
Remove the small silver layer with your pliers. Tap out black glass into garbage. Break the next layer of glass inside the bulb carefully, using the nail set and hammer again. Break off any little pieces around the inside edge of the bulb.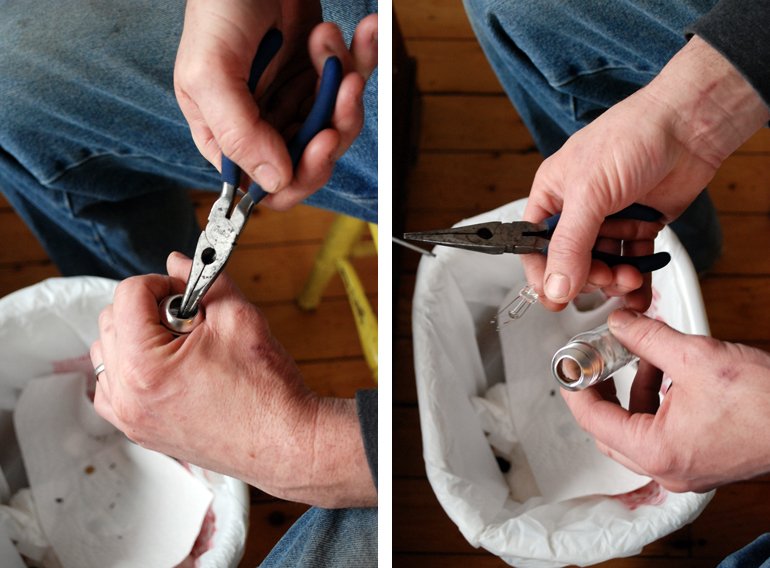
Remove the “guts” of the bulb with your needle nose pliers. Shake out any loose glass. You now have a vase.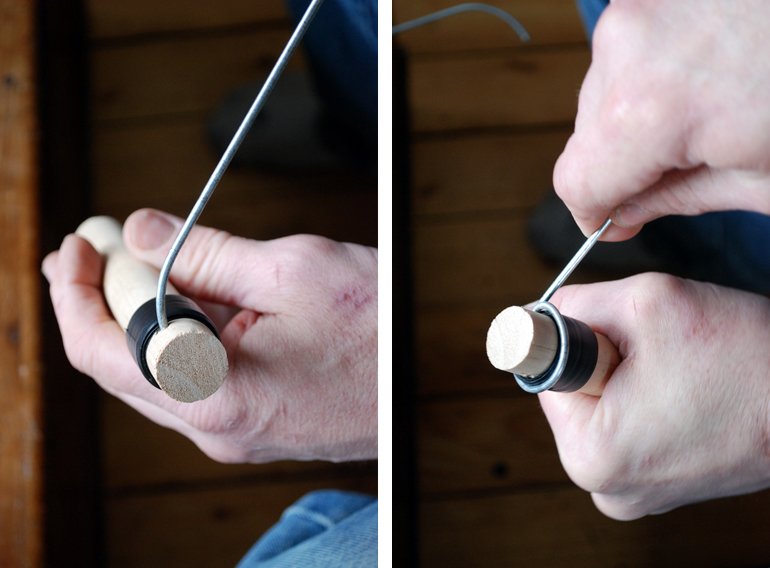
Drill a 1/8 inch hole in the dowel (or big enough for your wire to fit it in). Mike also wrapped a few layers of electrical tape around the dowel because the dowel wasn’t as big as the light bulb base. (You will also be able to adjust the size after removing the wire from the dowel). Cut your wire into 20″ pieces. Mike used the wire that you use to hang drop ceilings with.
Put wire into the hole in the dowel and start wrapping the wire around the dowel clockwise. Wrap it 2-3 times.
Use the wire cutters to remove the wire from the dowel, cutting right at the hole. Check to see if your bulb will fit into coils, adjust if needed by turning the wire with pliers to either tighten or loosen.
Thread bulb into wire, it should thread in and tighten up - like putting a bulb in a light socket. Bend wire down to form a base, shaping it how you like.
To make a hanging vase, follow the steps above for preparing the
light bulb. Then drill two holes in the bulb base and attach floral
wire.


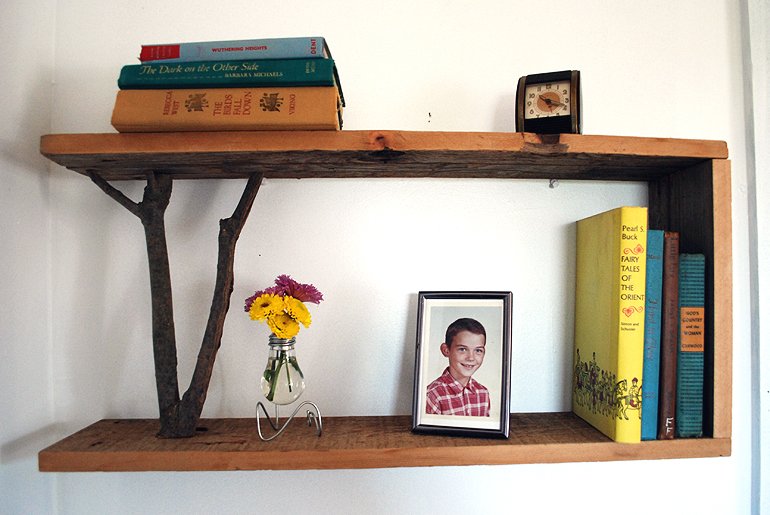
Enjoy your new cute, upcycled vase! Have a happy day! Manda.
Enjoy your new cute, upcycled vase! Have a happy day! Manda.
Nenhum comentário:
Postar um comentário